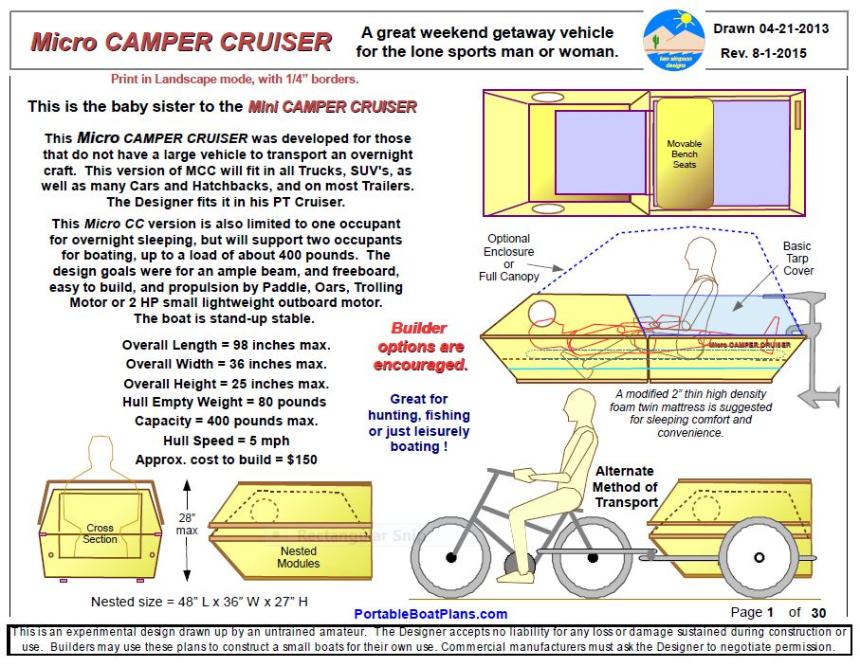
MICRO Camper Cruiser
Go to bottom of page for build photos and updates, as of Sep. 20, 2016.
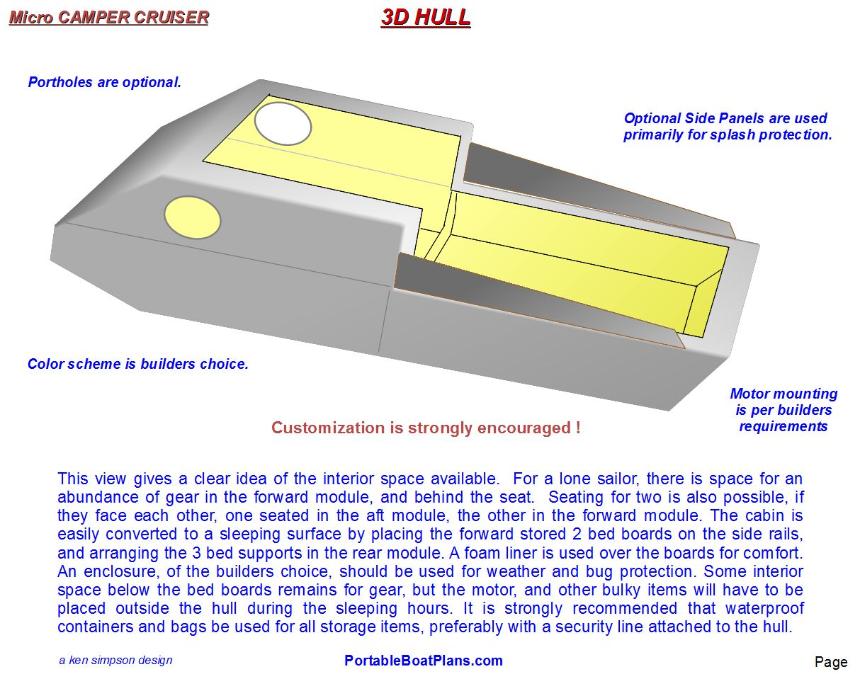
This design actually miniaturizes the Mini CC and makes it adaptable to easy transport, even with a bicycle. Sleeps one, supports two people.
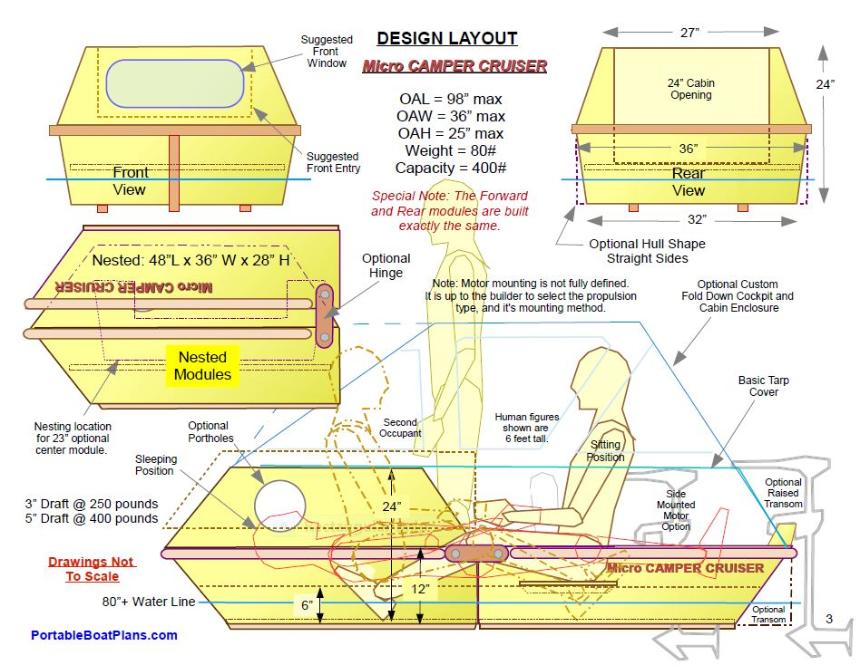
Plan modifications have been made to include an additional 2 foot long center module, for increased load capacity. It can be nested in the forward module for transport and storage. And, a wider hull design is included for an additional sleeping partner. Options for a modified hull shape, rounded bow and square transom, are also defined.
This is the Micro CC Movie. Go to end of page for construction photos.
Click on the "Micro CC Article.pdf" below for a review of the design.
Construction started August 2, 2016
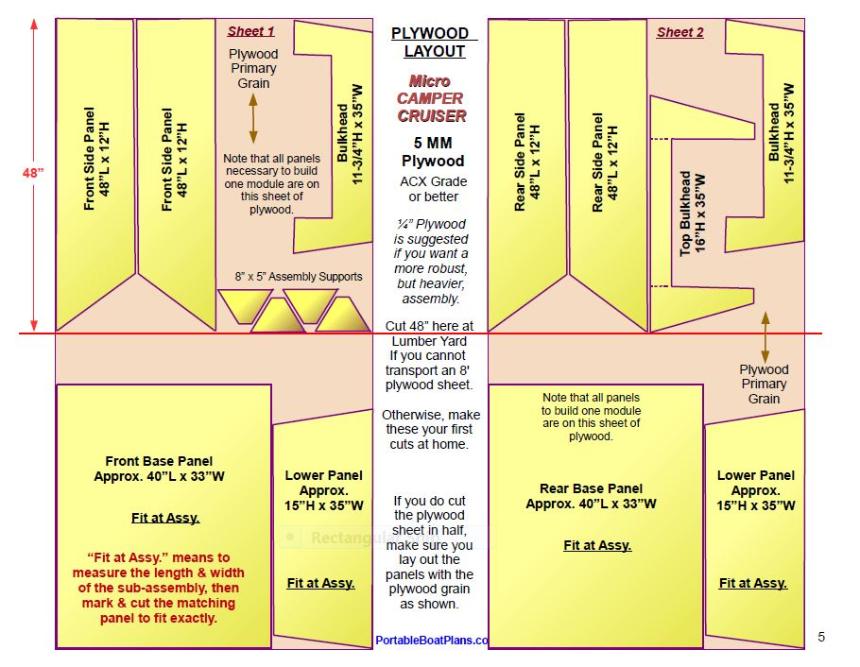
It all starts here. Four sheets of 5mm plywood, clipped together to prevent warping, cut into 4' x 4' size,
and ready to start laying out the various panels.
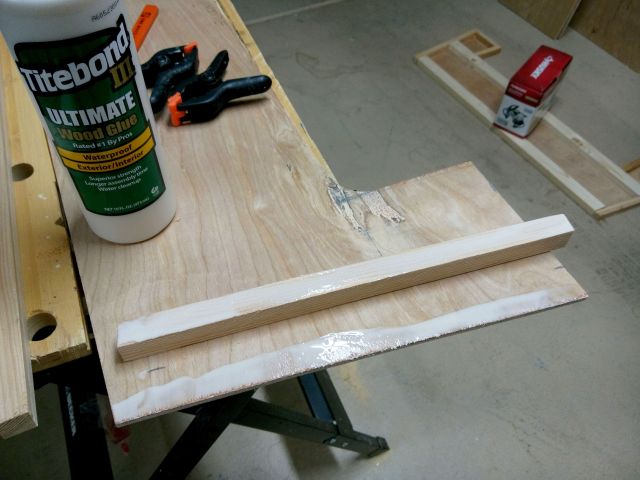
A cut Bulkhead, ready for the supports to be assembled. Note the application of TB3 glue on each part. This first application of TB3 seals and prepares the wood, then the final bead is applied, and the assembly secured.
The Bulkheads are the first to be constructed. The top one is freshly cut, the bottom one has the supports glued and brad nailed in place. They are identical, and will be facing each other in the final build.
August 3, 2016
Rounding all inside corners 1/4" is a must, eliminates sharp corners, reduces weight. I use the roto-tool shown.
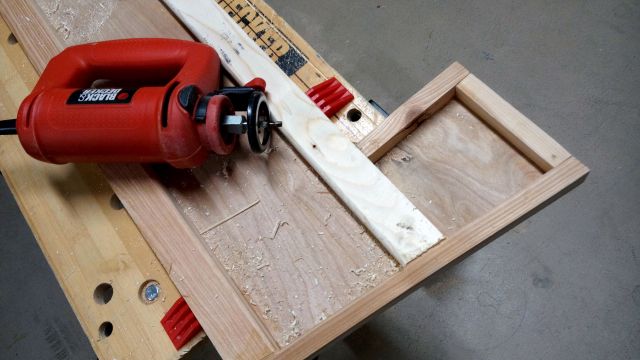
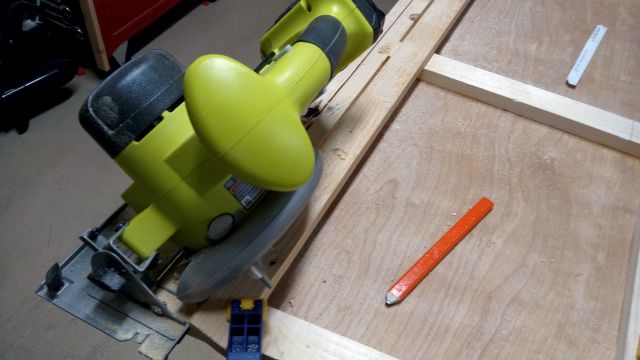
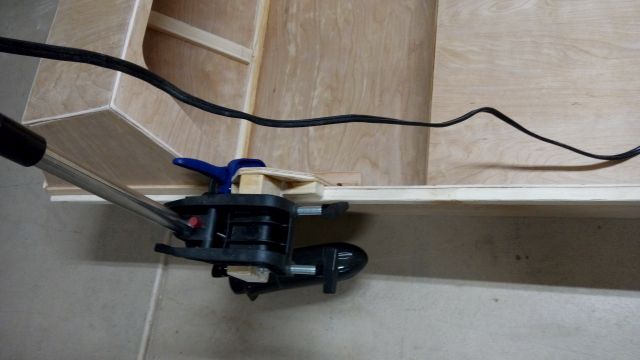
Work starting on the Transom, cutting and fitting the edge supports. Note the 7.5V lithium battery powered jig saw.
August 4, 2016
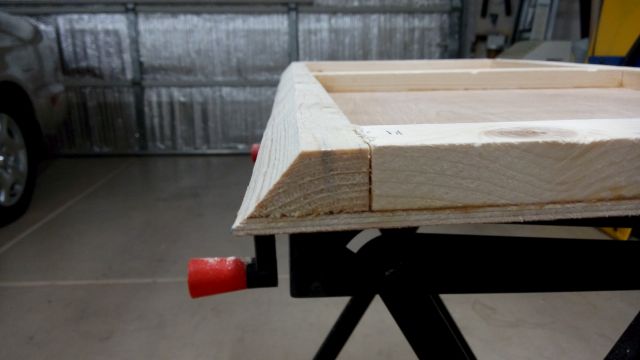
Cutting the 40 degree angles on the Transom, top and bottom.
The finished cut. Should fit the side panel perfectly !
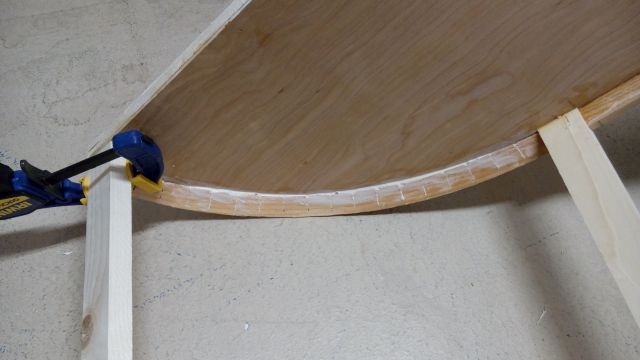
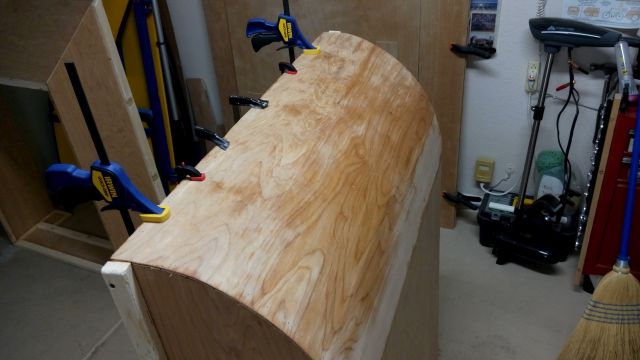
Adding the Rub Rails to the forward side panels. Note I have selected to build the rounded bow option.
August 5, 2016
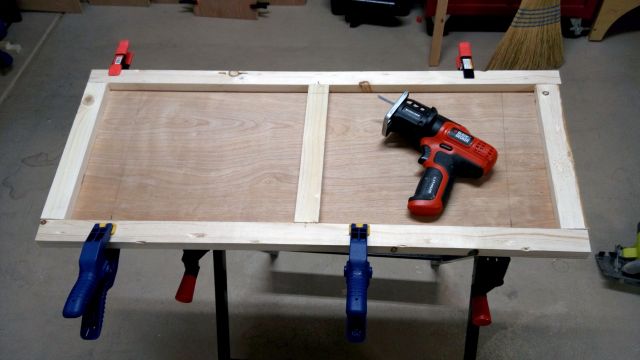
The forward module starting to take shape. Note the tools used, and the forward 1x2 spreader bar.
This is the chine support for the rounded bow. It has been kerffed every inch to provide a smooth edge.
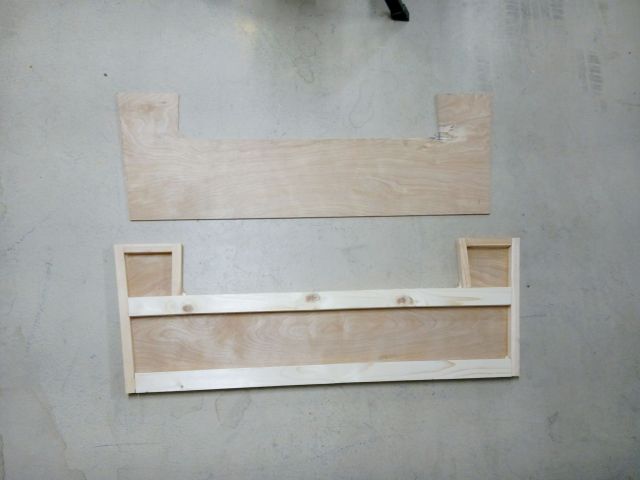
And these are all the panels constructed to date. Tomorrow the rear module assembly, and the forward base install.
August 6, 2016
The base installed on the front module. It is mounted to the rear half of the spreader bar, and all module edges.
The base panel for the rounded bow has been kerffed, and will be wetted, glued and brad nailed into position.
The bow panel soaked with warm water, both sides, and allowed to penetrate the wood.
Success ! No cracked or split kerffs, and the form looks good to go. Let the glue cure and the wood dry overnight.
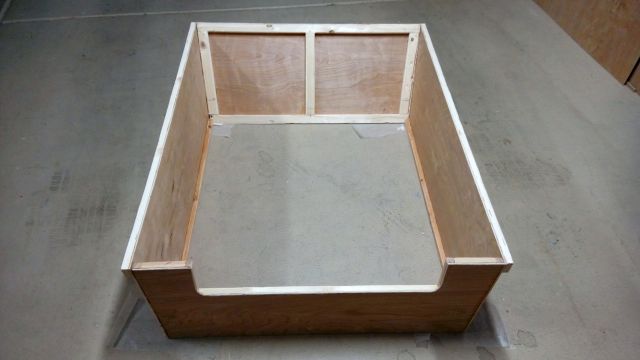
The start of the rear module assembly. Checking squareness is critical, as it must nest over the cabin for transport.
Aug. 7, 2016
Applied TB3 glue, in a semi-random pattern to the mating base panels, as shown above.
Panels installed, and weighted down to maintain thin bond line for strength.
Aug. 8, 2016
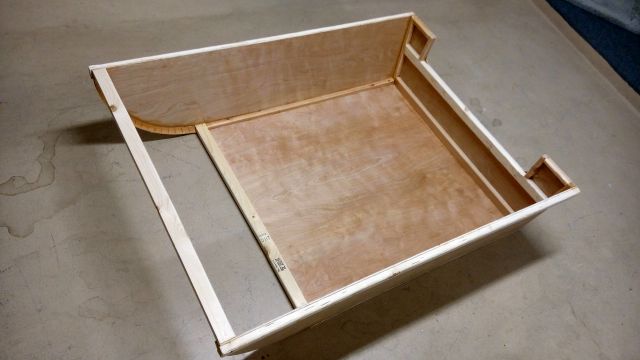
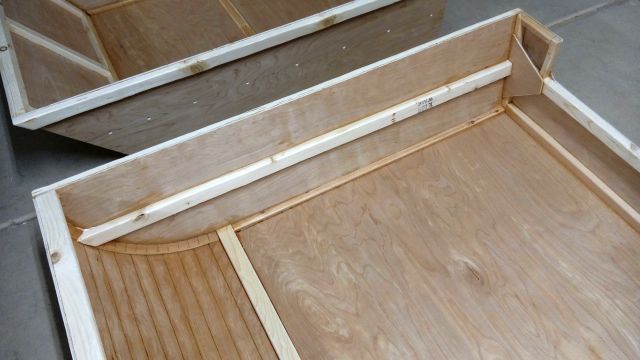
Today, one week into the project, both hull modules are complete, which includes the seat rails. The bottom panels have been trimmed to the side panels, all interior edges rounded, and all voids or gaps between panels filled with TB3 glue. The next step is to round all exterior edges and corners, in preparation for the Tape & Glue process. The last items to be installed are the 3 bottom skids, and this is done after the T&G process, and then all surfaces are sanded smooth to prepare for the waterproofing phase!
August 10, 2016
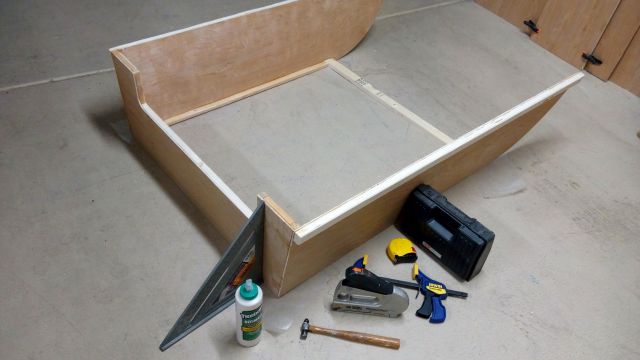
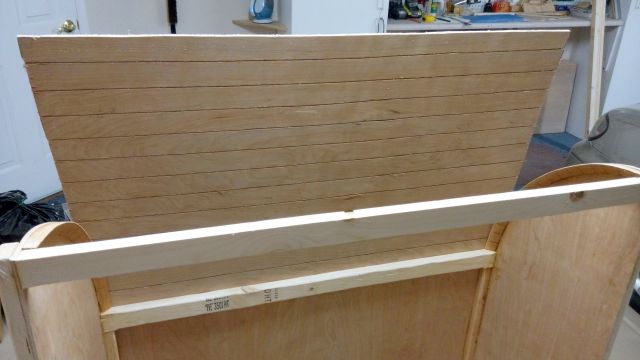
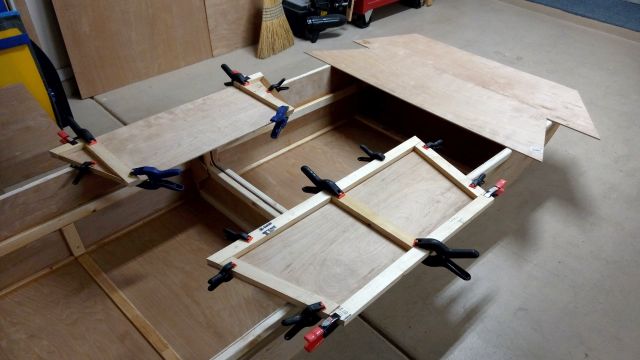
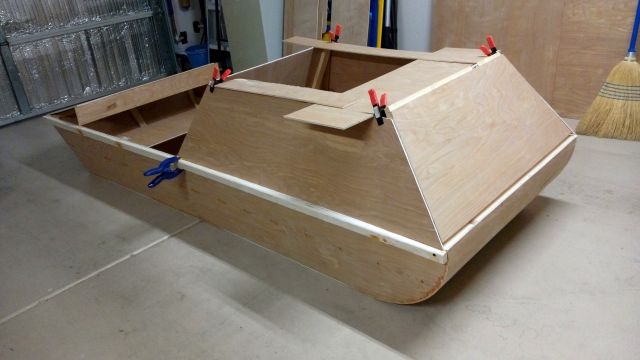
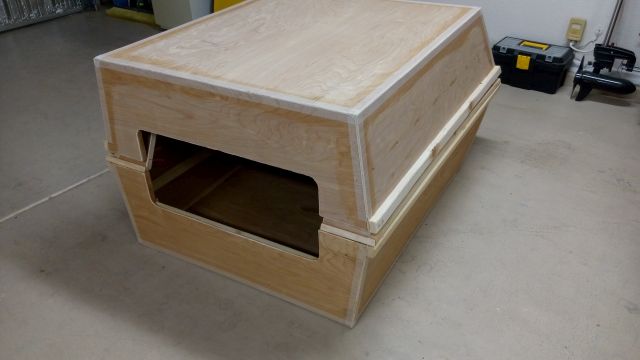
These are all the panels for the Cabin Module, minus the top.
In my desire to see what it will look like, I leaned the panels together, added a few scraps, and now you know too !
Aug. 13, 2016
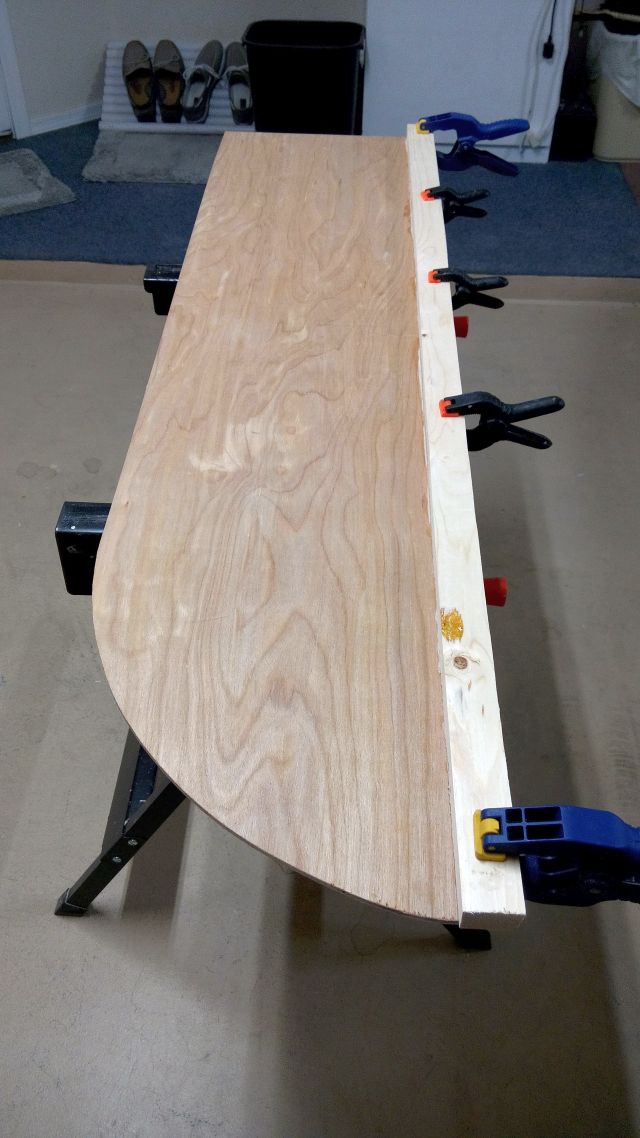
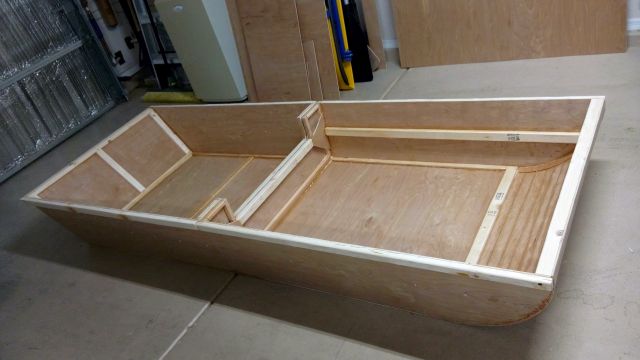
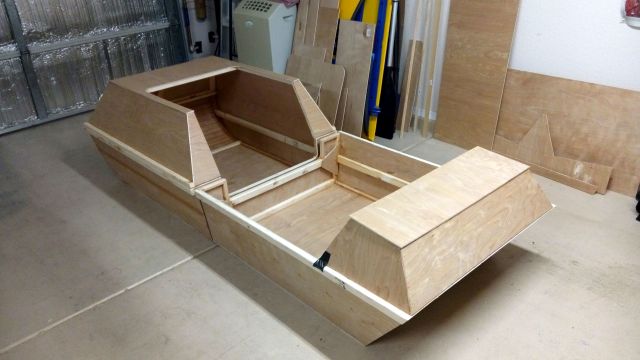
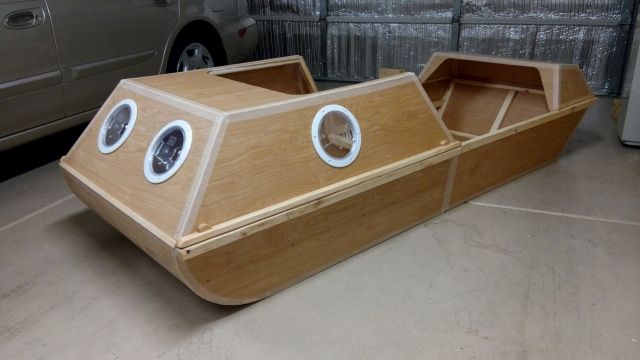
Finally, the completed hull form. Now for the rounding and sanding of all corners and edges.
This is a good view of the available interior volume. When complete, the rear enclosure can also act as a seat.
Today I ordered the four 8 inch window ports from Duckworks. Should look awesom !
Aug. 15, 2016
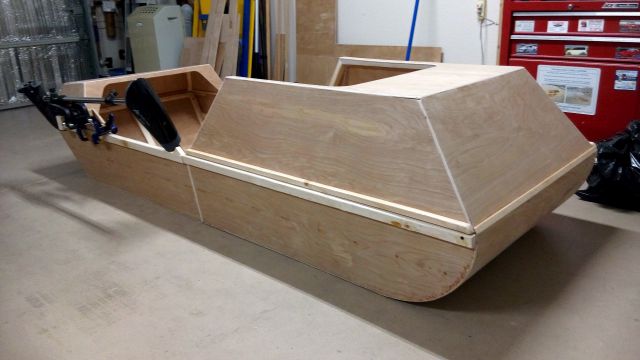
Finally all corners have been rounded, and the motor mount assembled and located on the rear side of the hull.
Close up of the motor mount showing its simplicity. The battery cable will be velcro mounted to the inside.
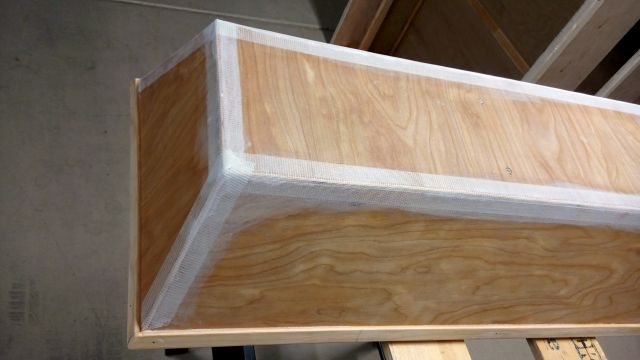
The next step is the Tape & Glue sealing of all external seams and edges for water protection.
Aug. 17, 2016
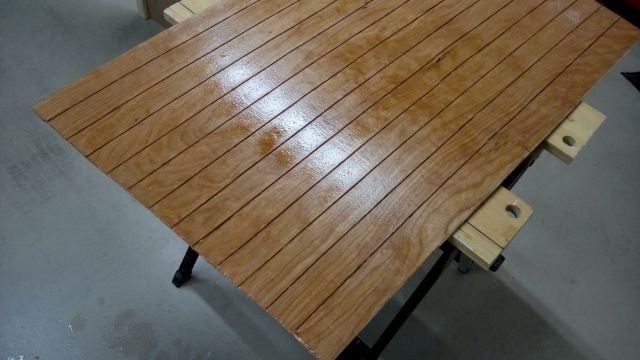
The first module to get the T&G Process is the optional Rear Enclosure, because it was the easiest to handle. Note that I also applied the panel waterproofing at the same time, as the mixes are the same for this Arizona heat.
Aug. 19, 2016
The hull modules nested, all edges taped, skids applied next and then the waterproofing process.
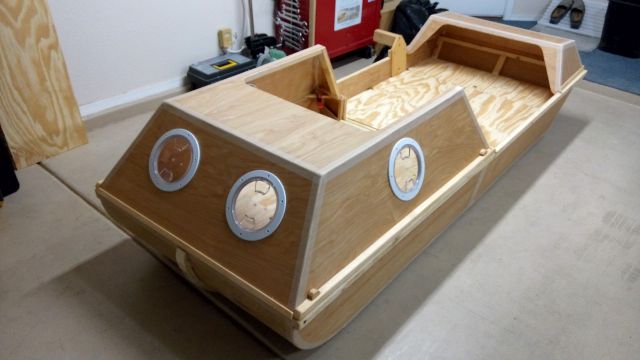
Nearing completion, all ports seated in position, and waterproofing completed. These are 6 inch deck ports, and fit this hull perfectly, thanks to "Duckworks Boat Builder's Supply" for their quick delivery service.
Special items like these will be specified on the plans for easy identification and purchase.
Aug. 22, 2016
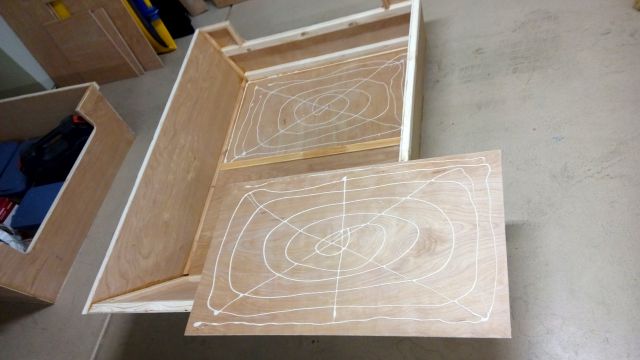
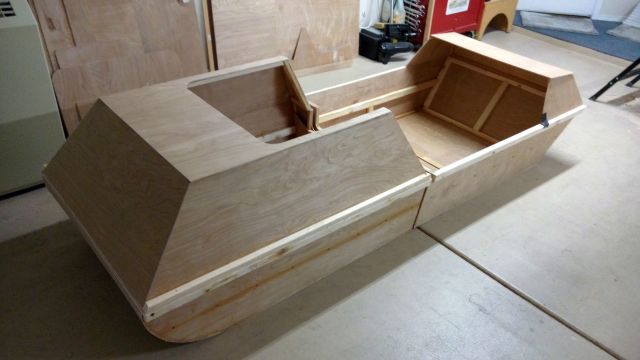
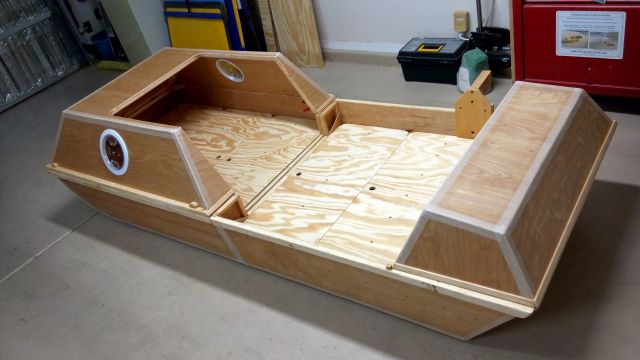
A nearly completed hull, with ports. The bed platform panels installed for inspection. It looks cavernous !
The next step is to sand smooth every surface, select finish type and color, and prepare for the maiden voyage !
A view into the cabin, it too is more than ample. Note also the motor mount on the starboard side. Everything fits !
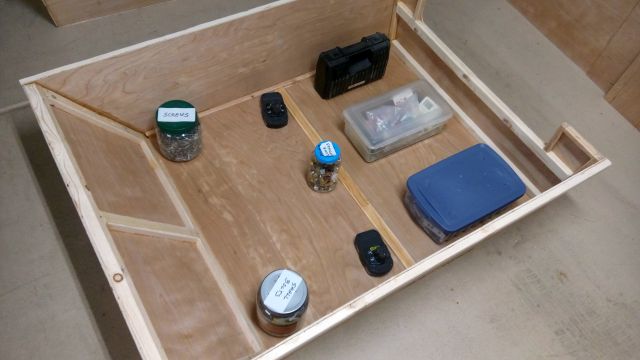
Remember, the storage space below the platform holds all loose items, including the trolling motor and battery.
Aug. 23, 2016
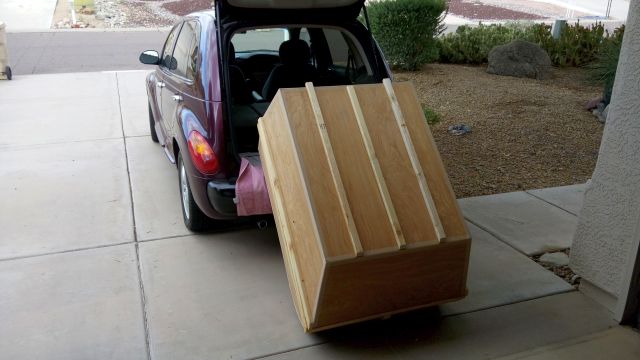
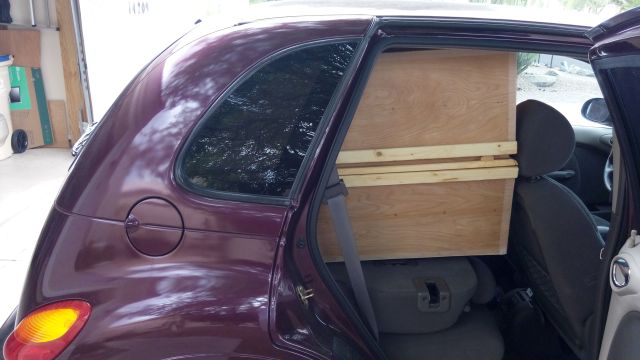
MICRO CC modules assembled and nested for transport. PT Cruiser hatch open and waiting.
MICRO CC successfully inserted in the vehicle !
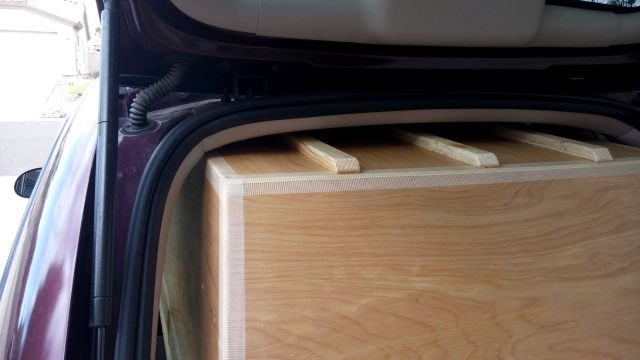
An inch clearance on each side. Good planning.
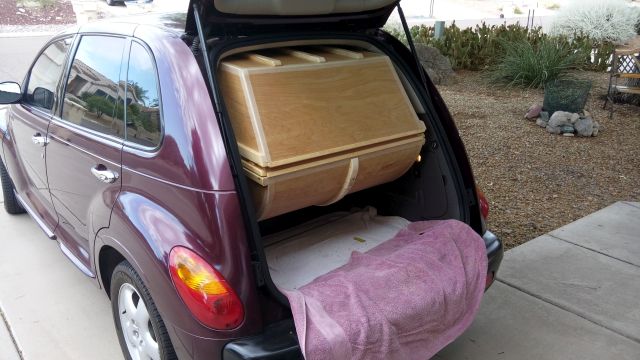
Hatch closed, proof that it all fits in a small space. Apply finish next, and then the water tests. Can't wait !
In case you are wondering, the front seats did not have to be moved forward, driving comfort as usual.
Allow about a week for the next photos. A lot of sanding and finishing remain to be done.
Aug. 28, 2016
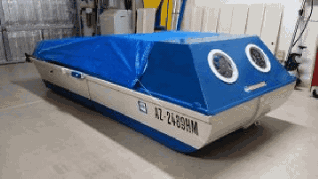
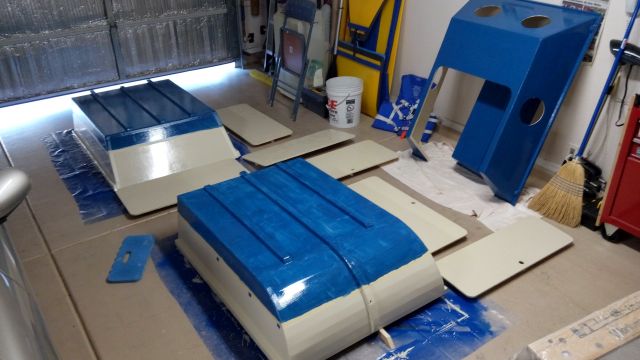
Sneak peek at the color scheme. Here are all modules, and seats. The inside and outside of the hull will be a bright almond color. Inside there will be a band of natural wood at the gunwale, for display. The top modules, cabin and aft enclosure, are a navy blue, as is below the water line of the hull. This will allow the Micro CC to be easily seen on the water. Finally, a thin band of red will run all around the hull at gunwale level.
Aug. 29, 2016
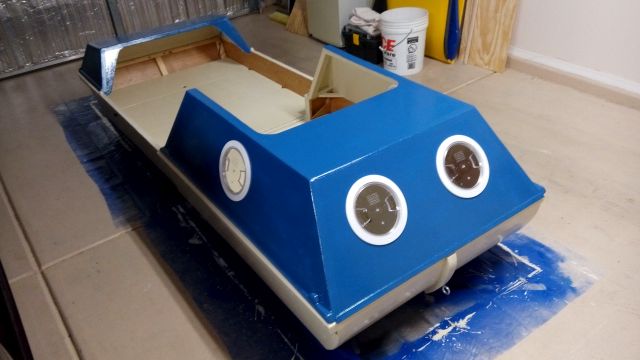
The finished painted hull, with internal platform, and the installed portholes.
I am projecting that total hull completion will be the end of this month ! This means that it actually took 30 days of casual work to complete the layout, construction, and finishing of the MICRO Camper Cruiser.
Aug. 30, 2016
In response to many of you who requested more information about a rear mounted motor, the above photo shows but one solution. Mounting the motor on the transom is best when more than one occupant is in the boat, as it provides rear seating for one, and forward seating for the other. The optional rear enclosure is not used. This mount is secured with one 3/8" bolt through the hull, well above the water line, and a 2x4 that extends centrally on the transom for better weight and force distribution. Note too that the mount arm extends down low for strength.
Aug. 31, 2016
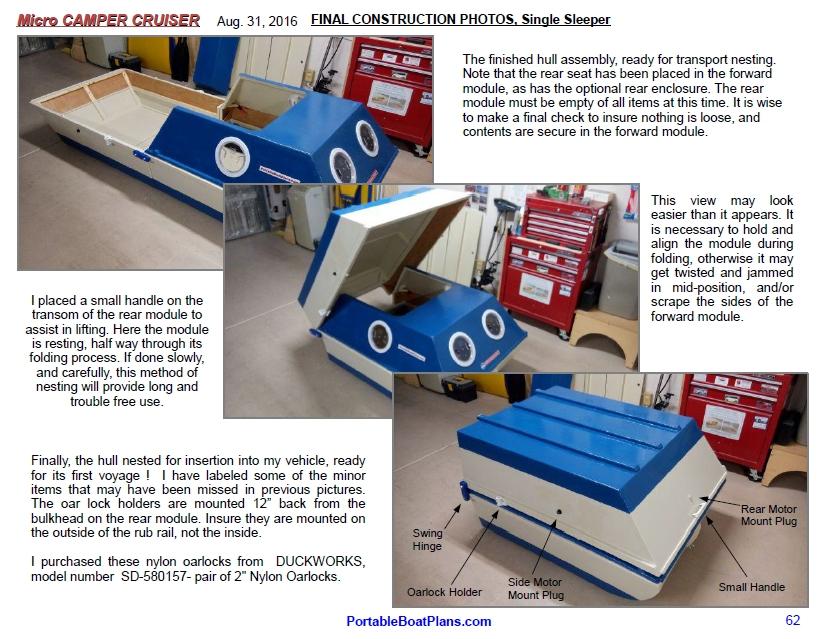
This is page 62 of the plans, and it finalizes the build. The next pictures might be of the MICRO CC in the water !
September 2, 2016
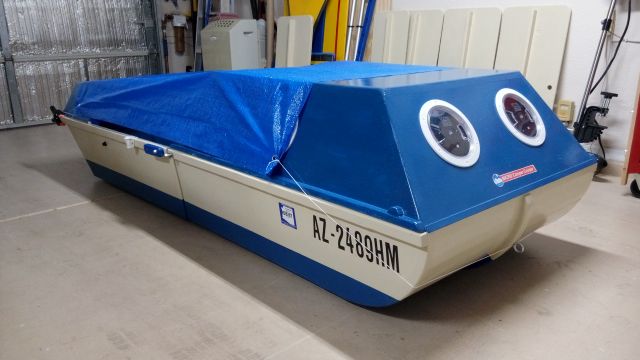
Went to the Arizona Game and Fish Department yesterday to register the Micro CC. Filled out the paperwork, then headed out to the car, with the inspector, to take a look. Was immediately asked where was the boat? Explained it was in the PT Cruiser, and received a questioning look! Opened the hatch, pulled out the Micro, unfolded it right there in the parking lot, and received a "that's a great little boat" comment. It took all of 5 minutes time, and we were back in the office. Paid the fee, got the registration. It's now legal on all Arizona waters.
Note the mock-up of a tarp cover, and the registration numbers. This tarp will protect the interior of the boat when outdoors, and a similar configuration could be used to shelter a lone sleeper, albeit in close quarters! I am also working on an enlarged tarp enclosure, providing more interior room for the occupant, either siting or reclining.
Sep. 6, 2016
Sept. 10, 2016
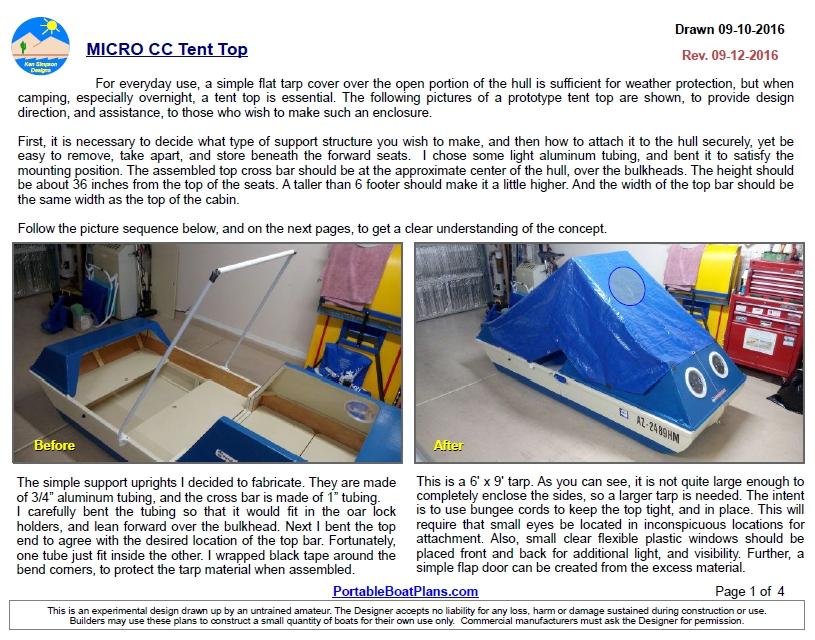
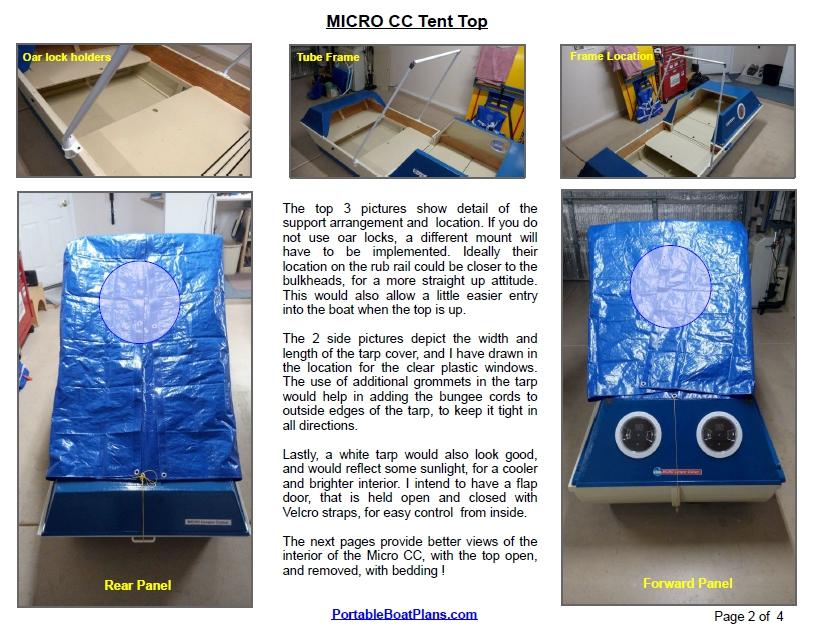
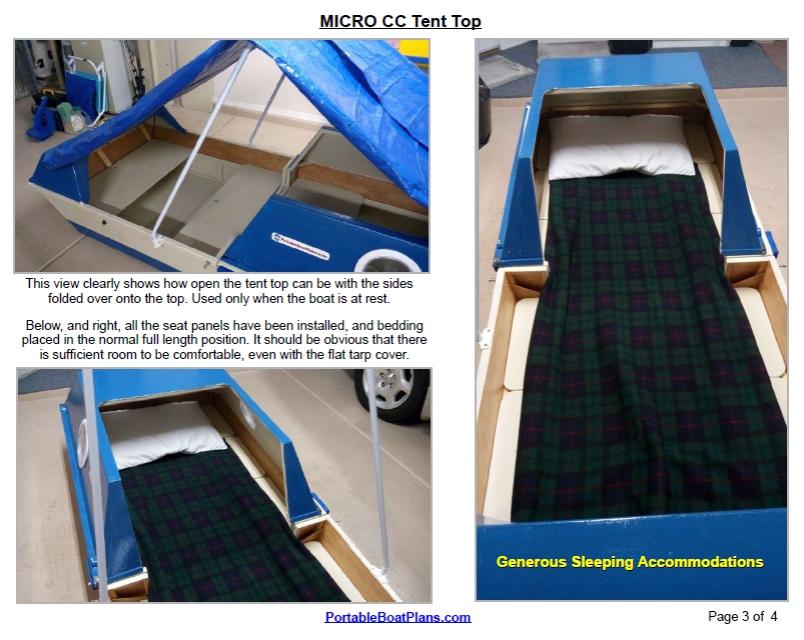
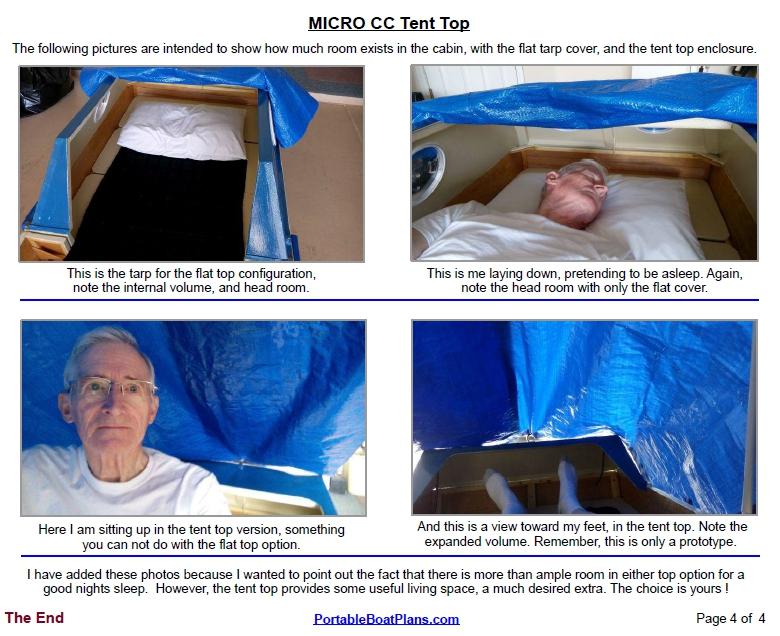
The following pictures are of the prototype Tent Top Enclosure.
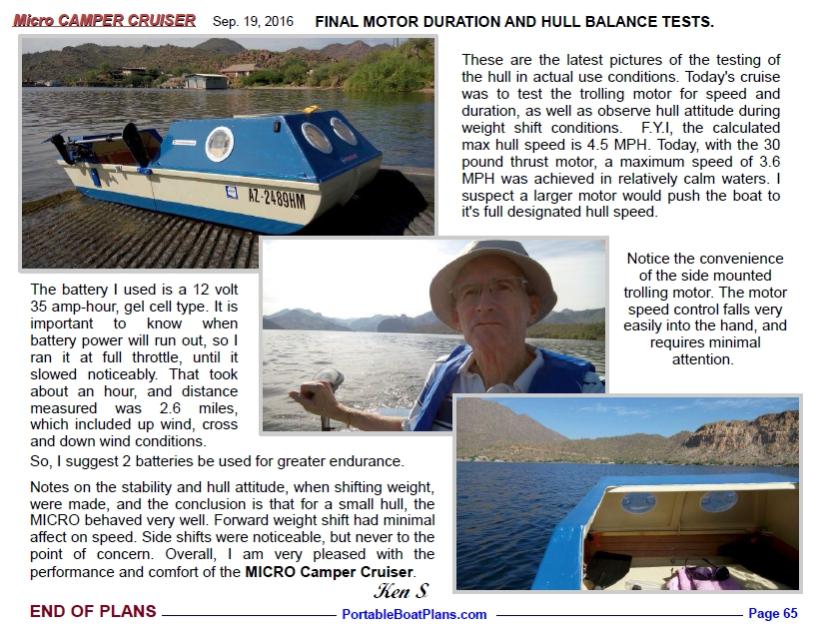
Sept. 20, 2016 Added page 65 of plans below.
SCROLL TO TOP OF PAGE, CLICK "HOME" FOR MAIN MENU, OR SELECT BROWSER BACK BUTTON.